Natural Dye Workshop with Michel Garcia and Sustainable Dye Practice
A film series and discussion forum dedicated to the science and practice of natural dyes and pigments using sustainable methods.
Maintaining and Troubleshooting an Organic Indigo Vat with Catharine Ellis
Sometime ago Yoshiko asked me to occasionally provide some useful input to the Dye Nerds Blog. I thought that I might offer the following tutorial on how I solved a problem with my own organic indigo vat as a first contribution. I have been making and using organic indigo vats since 2011, when I first learned about them from Michel Garcia. It is the same vat that he introduces in the DVD, Colors of Provence.
The maintenance of an organic indigo vat is a blend of art and science. As the user gains familiarity with the process, this becomes more intuitive. A key part of ensuring acceptable results from the vat is making sure that it stays in strong “reduction” and this can only be accomplished by observing the vat’s color and surface as an indication of it’s health and reacting appropriately when action is required. Keeping records of the status of the vat and the changes that you make will help in building a “history” that will create comfort and expertise with the organic indigo process.
So let me tell you a bit more about that subject by sharing some of my own experiences.
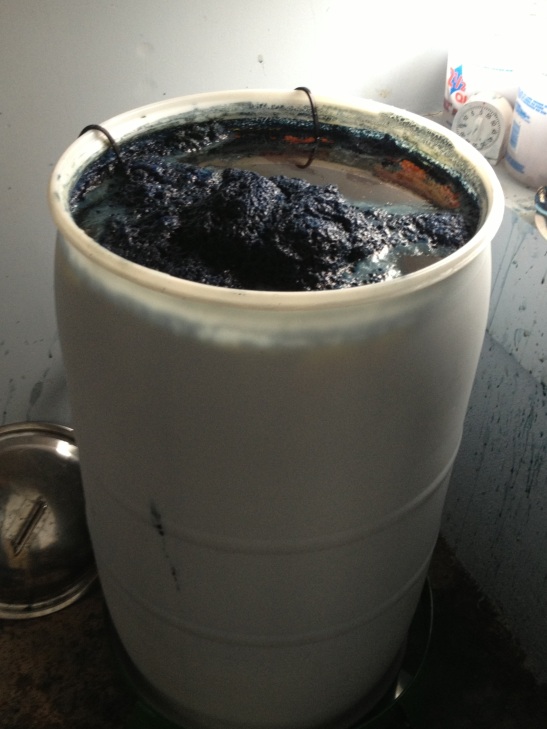
My current vat began in a 5 gallon vessel over 2 years ago. I enlarged it to fill an 8 gallon vessel, and then last year I enlarged my vat again to fill a 30 gallon container. The larger size was needed because I was dyeing larger pieces of cloth.
The vat was made using henna as a reduction material. I chose to use this material because the slow release of sugars is good for a vat that will be maintained for a long time. I add fructose after each use and additional henna when I need to boost the reduction. Lime (calcium hydroxide) is the alkaline.
The vat is used regularly and I achieve excellent color from the indigo. The large size challenges me to solve problems as I encounter them. It would be tempting to discard a small vat that was not behaving well and begin again, but emptying this vat would require a great amount of effort. As a result I’ve learned a lot about maintaining the indigo vat.
An indigo vat is happiest when it is used on a daily basis. After each dyeing session I “feed” it with a bit of fructose, stir it to bring the un-reduced indigo and reduction materials up from the bottom, check the pH, and let it rest for a few hours before dyeing again.
Occasionally I run into problems that I need to solve. Recently I was away from home for several weeks. Before I left, the vat was dyeing rich, deep blues. The color of the vat was a golden bronze and there was a good healthy “metallic” sheen on the surface and plenty of bubbles.
When I returned home the first thing I did was add lime to the vat. When an indigo vat sits dormant for any amount of time it becomes more acidic and the pH goes down. I can test this with pH papers but a good visual indicator is to sprinkle some lime on top. If the lime is immediately “sucked” down into the vat – you can assume that the vat is in need of the lime. If the lime just sits on the surface, the pH is probably fine.
Next, I stirred the vat and waited for it to settle. The color of the vat looked good, as well as the surface. The vat was a clear gold color and there was a coppery sheen on top. But the first test sample resulted in barely any color at all! That was a surprise, since I thought there was plenty of indigo in the vat. I thought I had also been “feeding” it with plenty of sugar. The vat had been used very heavily before I went away. I thought that possibly the indigo had finally been exhausted.
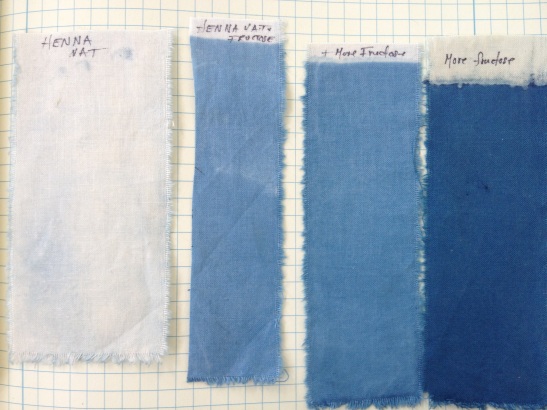
Before adding more indigo to the vat, I decided to add more sugar – a generous amount. Once added, the vat was stirred and I waited until the next day to do another test strip. It produced a blue, though it was relatively light. I repeated the sugar-stir-rest and dyed again the next day. It was darker. I repeated the sequence again, and finally got back to a shade of blue similar to that which I had before going away.
The lesson here is that before adding indigo to a vat test it thoroughly for pH and reduction. Although it “appeared” to be healthy, my vat was not reduced and the indigo wasn’t available to dye the fibers.
I keep a log with my indigo vat and make a sample test strip on cotton each day before dyeing. Trust yourself to experiment with the vat. Keep a record of what you are doing and how your vat is dyeing. It’s the best way to get to know it and build confidence as an indigo dyer.
Read more from Catharine Ellis on her blog: http://blog.ellistextiles.com


Thank you so much for the above information – I have been using my henna/indigo vat for about 6 months now with generally good results, but plenty of questions, so this type of practical information is invaluable.
Reblogged this on World Shibori Network and commented:
WSN member and woven shibori expert – Catherine Ellis, shares how she maintains her natural indigo vat on our Dye Nerd’s Blog.
thank you for this interesting information! What about adding water if your vat is going to ‘loose’ more and more water by the dyeing proces?
You will inevitably lose volume as the vat is used. Instead of adding plain water, use the water from the bucket where you have done your initial rinse of the indigo. It will contain some indigo, reduction material, and lime. It’s like adding a weak vat.
Catharine
Great idea!!! I have five vats and fifteen kids sloshing around in them. We can save a lot of water and indigo this way. Love your blog.
What works best for me is to cook kitchen scraps (vegetables and fruits, no citrus) and strain the hot liquid add to the vat to revitalize it. It works like magic. Yoshiko
Thank you so much. I hadn’t used my vat for a few weeks. It’s started as a peach and the banan fructose vat so I was attached to it. However when I last used it the wool I dyed got burnt when I left the element on too high and left ash reside in the vat. Then I noticed some mold growing in too when I checked it a couple of time over the last few weeks. Was so close to chucking it but with you suggestion of lime and love added it’s brewing and growing a sweet flower.
I will definetly be making notes about this testing indigo dyeing experience.
After four months of vacation, I now know what to do now T.K.
I got the DVD and starting out. I see how to test for PH (got a ph meter) and reduction (clear gold) but I gather that the copper sheen and bubbles are not enough to test if there is enough indigo in the vat and that a test fabric should be used. Is the depth of the yellow color an indicator of the amount of indigo in the vat?
Thank you for writing in.
Yes, the ‘yellow’ tends to get lighter when the indigo is used up. However, the surest way to know, is to use a test piece of fabric.
Fascinating article. I’m considering my very first indigo vat and have been reading up in Jim Liles’ Art and Craft of Natural Dyeing, but the idea of an organic vat really calls to me. Thank you.
Curious to know how much lime and fructose was added during her ‘revival’ period, and also how much henna/fructose she feeds it daily…